First things first, it is assumed that you know how to use a terminal on your machine, if you're unfamiliar with the terminal, best get familiar with that first.
You're also going to want to use Node 8 as this is the current LTS (long term support) version.
We're going to use yarn instead of npm to ensure our dependencies are in lock step.
Create a new directory for this tutorial and install broccoli:
1 | mkdir broccoli-tutorial |
The above command will add broccoli and broccoli-cli as dev dependencies of your project. The CLI tool can also be installed globally if you wish, it just checks some basic dependencies in the current project before running the main broccoli library.
In your package.json add the following to the scripts node (add this if it's not present):
1 | { |
You can now use yarn build and yarn serve for convenience.
Debugging
If you use VS Code or an Intellij product from Jetbrains you can enable interactive debugging via a few simple steps. First, replace the scripts above with the following:
1 | { |
VSCode
After this, you'll need the files in this directory.
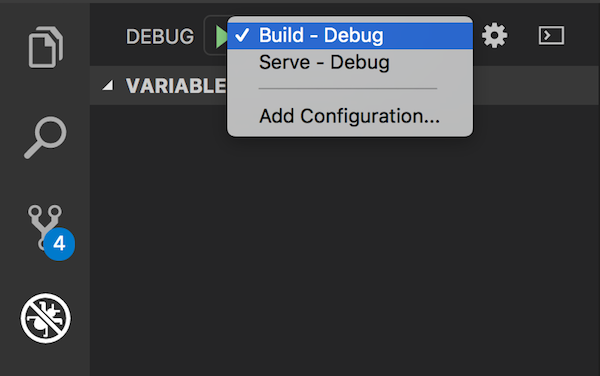
Once you have those in your project, you'll see the Build - Debug and Serve - Debug in your debug tab, see
the VSCode docs for more details on debugging.
Intellij
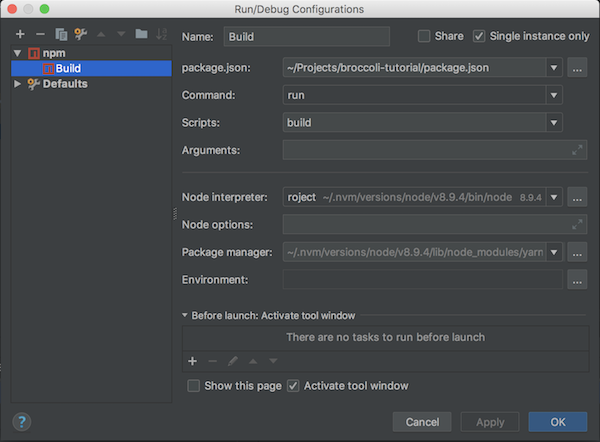
Select Run > Edit Configurations from the menu bar, click the + in the top right hand corner, and select npm.
Name the configuration Build, ensure run is selected in the command entry, and select build from the scripts
dropdown, and hit apply. Repeat for the serve script.
You can now add breakpoints by clicking in the column to the left of the line numbers (on the left) and then proceed to invoke a debugging session:
VSCode:

Intellij:
 Screenshot 2018-09-20 18.57.10
The build file
Broccoli uses a file called Brocfile.js that must live in the root of your project, this is what will contain your
build pipeline.
So create a Brocfile.js in the root of your project, with the contents:
1 | // Brocfile.js |
Next, create a directory app within the project, and add a index.html file with the contents Eat your greens!.
1 | mkdir app |
That's it, you're done.
The initial setup of this tutorial merely copies files from the input app directory by exporting the string app.
The Brocfile.js contains the Broccoli configuration for the build. The module.exports line must export a Broccoli
tree. "But it's a string" you say, yes, Broccoli will automatically convert a string into a source node, and on build,
validate that the directory exists. In this case, the Brocfile merely exports a single tree, containing the contents of
the app directory, this will then be copied to the destination directory (dist in our case).
To run a build, run yarn build (if you added the script) or rm -rf dist && broccoli build dist.
You should see something like:
1 | $ yarn build |
This yarn command will remove any previous builds, and run a new build, outputting to the dist directory.
Broccoli doesn't remove previous builds by default, so we must remove it before starting a new build.
The contents of app should now be in the dist directory. Try:
1 | $ cat dist/index.html |
Now try running yarn serve or broccoli serve and you should see:
1 | $ yarn serve |
You will see the URL http://localhost:4200, if you open this in the browser, you should see:
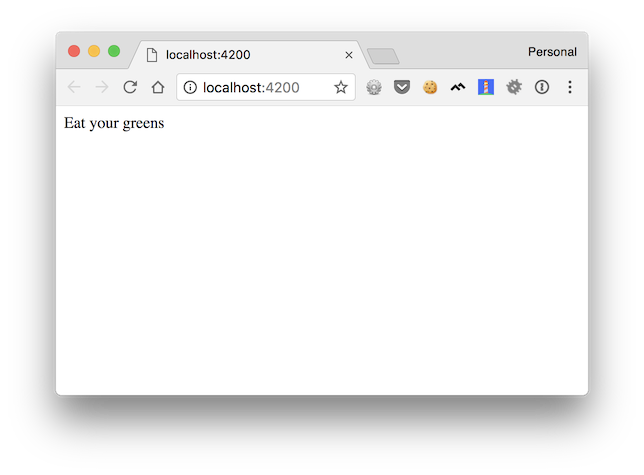
Great, your first Broccoli build is complete, pat yourself on the back 👏.
Completed Branch: 01-setup
Next: 02-funnelling-files